As I discussed yesterday, I experimented with the bind-off for my toe-up socks with a tubular bind-off. I’d previously read about the technique but I hadn’t actually tried it.
That was just silly. This cast-off is so easy. The secret to the tubular bind-off is that in the end, it’s really just grafting. That’s right, if you can Kitchener stitch your top-down sock toes, you can work a tubular bind-off. (Many thanks go to my friend Heather for helping me out with the photography again!)
The “hard” part is in the set up; the inconvenient part is that this really only works for 1×1 rib (that I know of). So here’s my little sample of 1×1 rib.
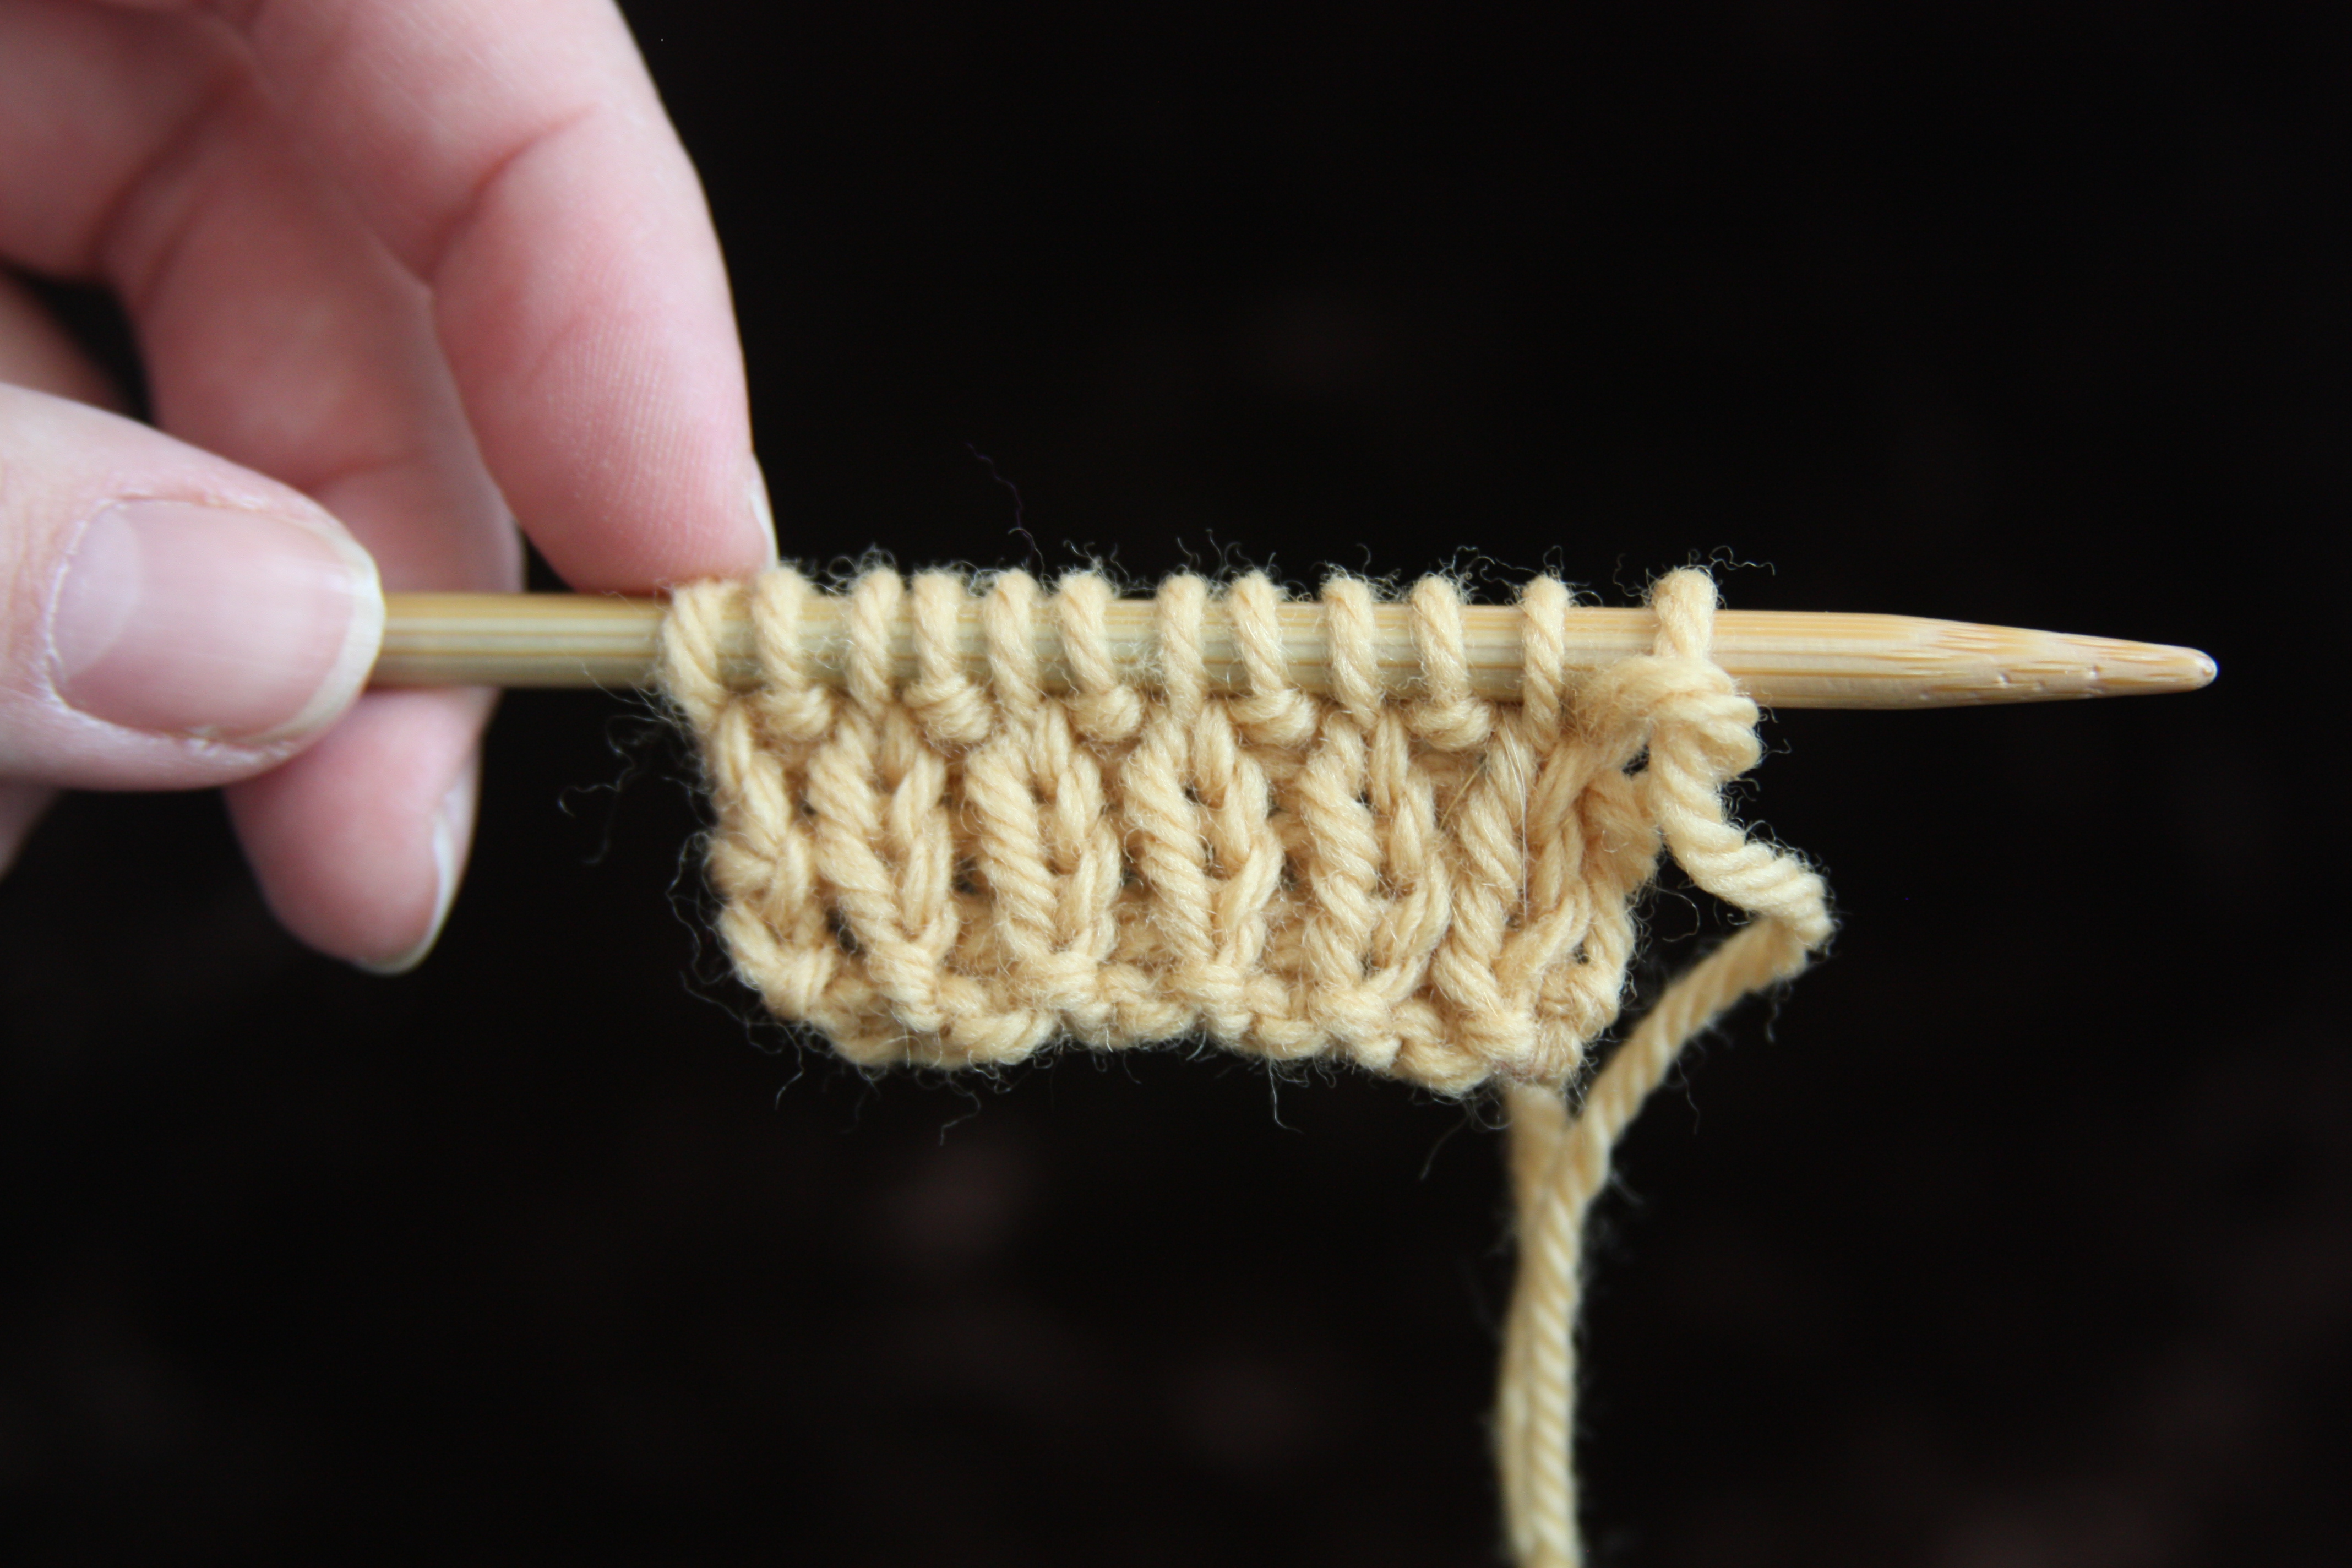
The first thing I’m going to do is take two spare DPNs and start rearranging my stitches. I’m going to slide the first stitch purlwise (as if to purl) onto one DPN.

I’m going to slide the second stitch purlwise onto the other DPN. Make sure you’re always slipping your stitches purlwise.

Repeat these last two steps until you have a good number of stitches on your double-points. If you’re working this on a sock, you probably won’t want to separate all of the stitches at one time—that’s a lot of stitches to sit on a double-point.
When you can’t really separate any more stitches onto the DPNs, take the tail of your yarn and thread it on a yarn needle. If you have the Kitchener stitch process memorized, go about your merry way. If you need a refresher, here you go.
Insert the yarn needle purlwise into the first knit stitch facing you, and pull through.

Move the yarn needle to the back and insert knitwise into the first purl stitch facing you, and pull through.
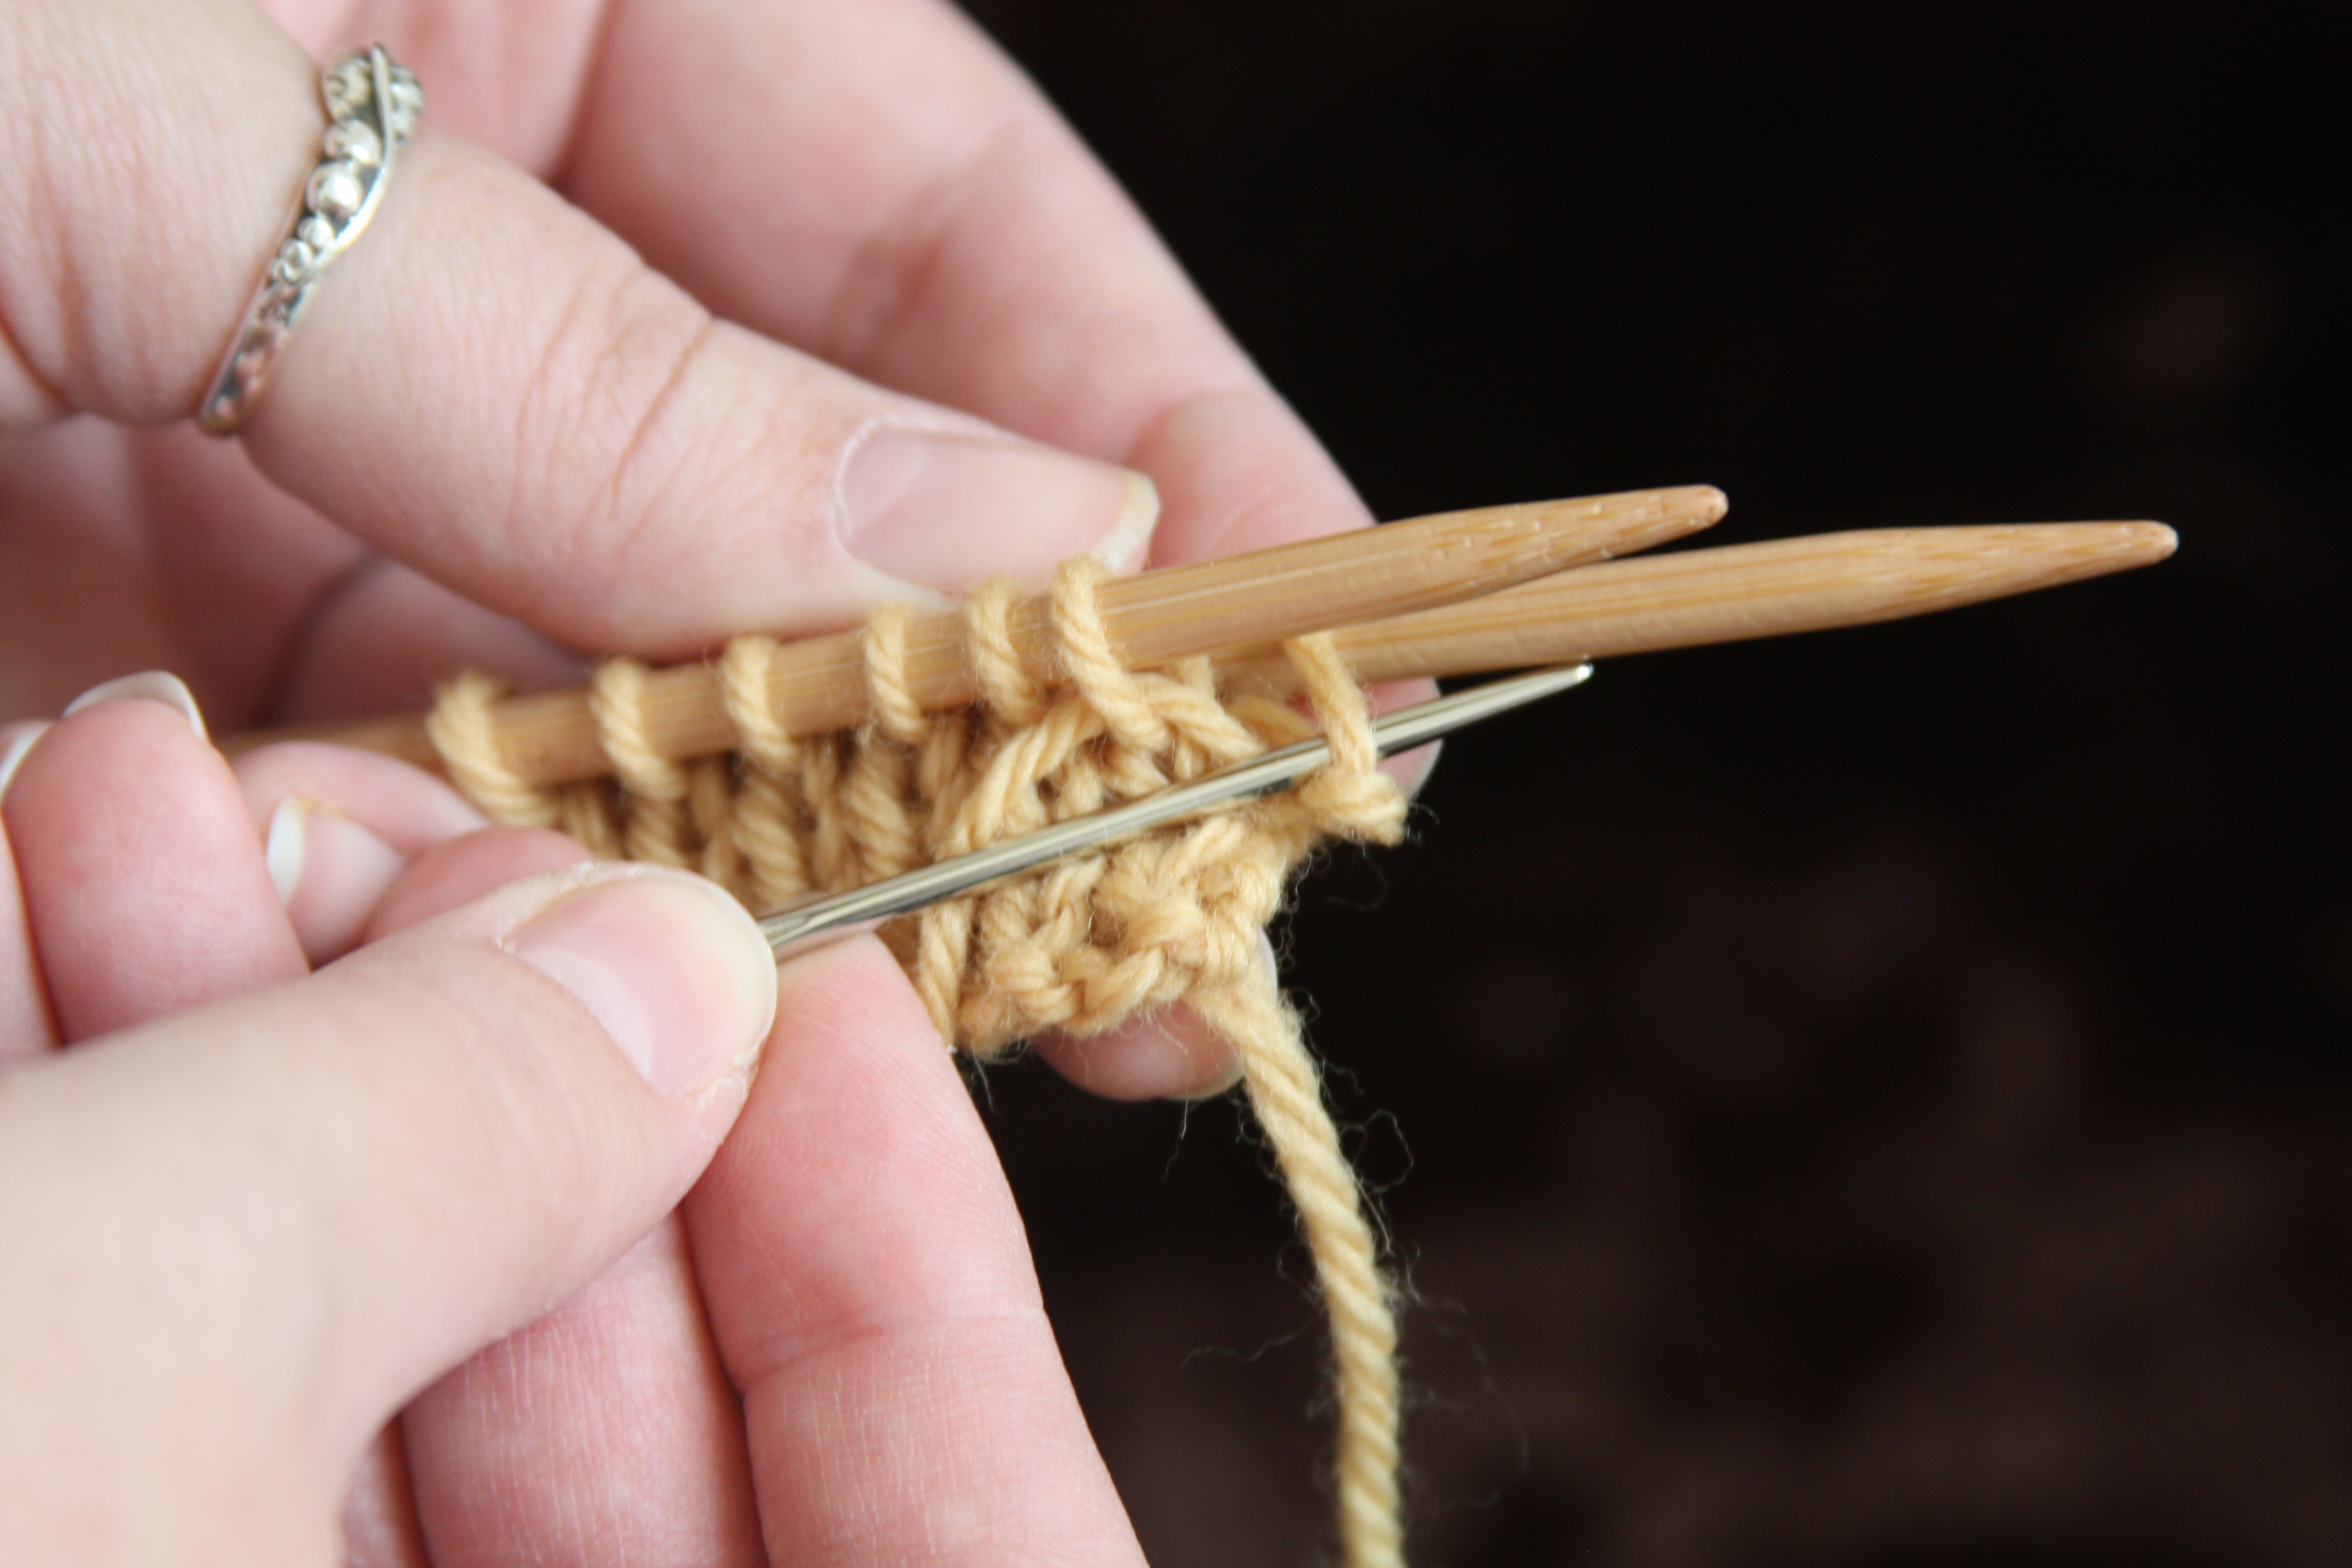
Move the yarn needle to the front again, and insert knitwise into the first knit stitch facing you, pull through, and slide this stitch off the needle. Then insert the yarn needle purlwise into the first knit stitch facing you and pull through.
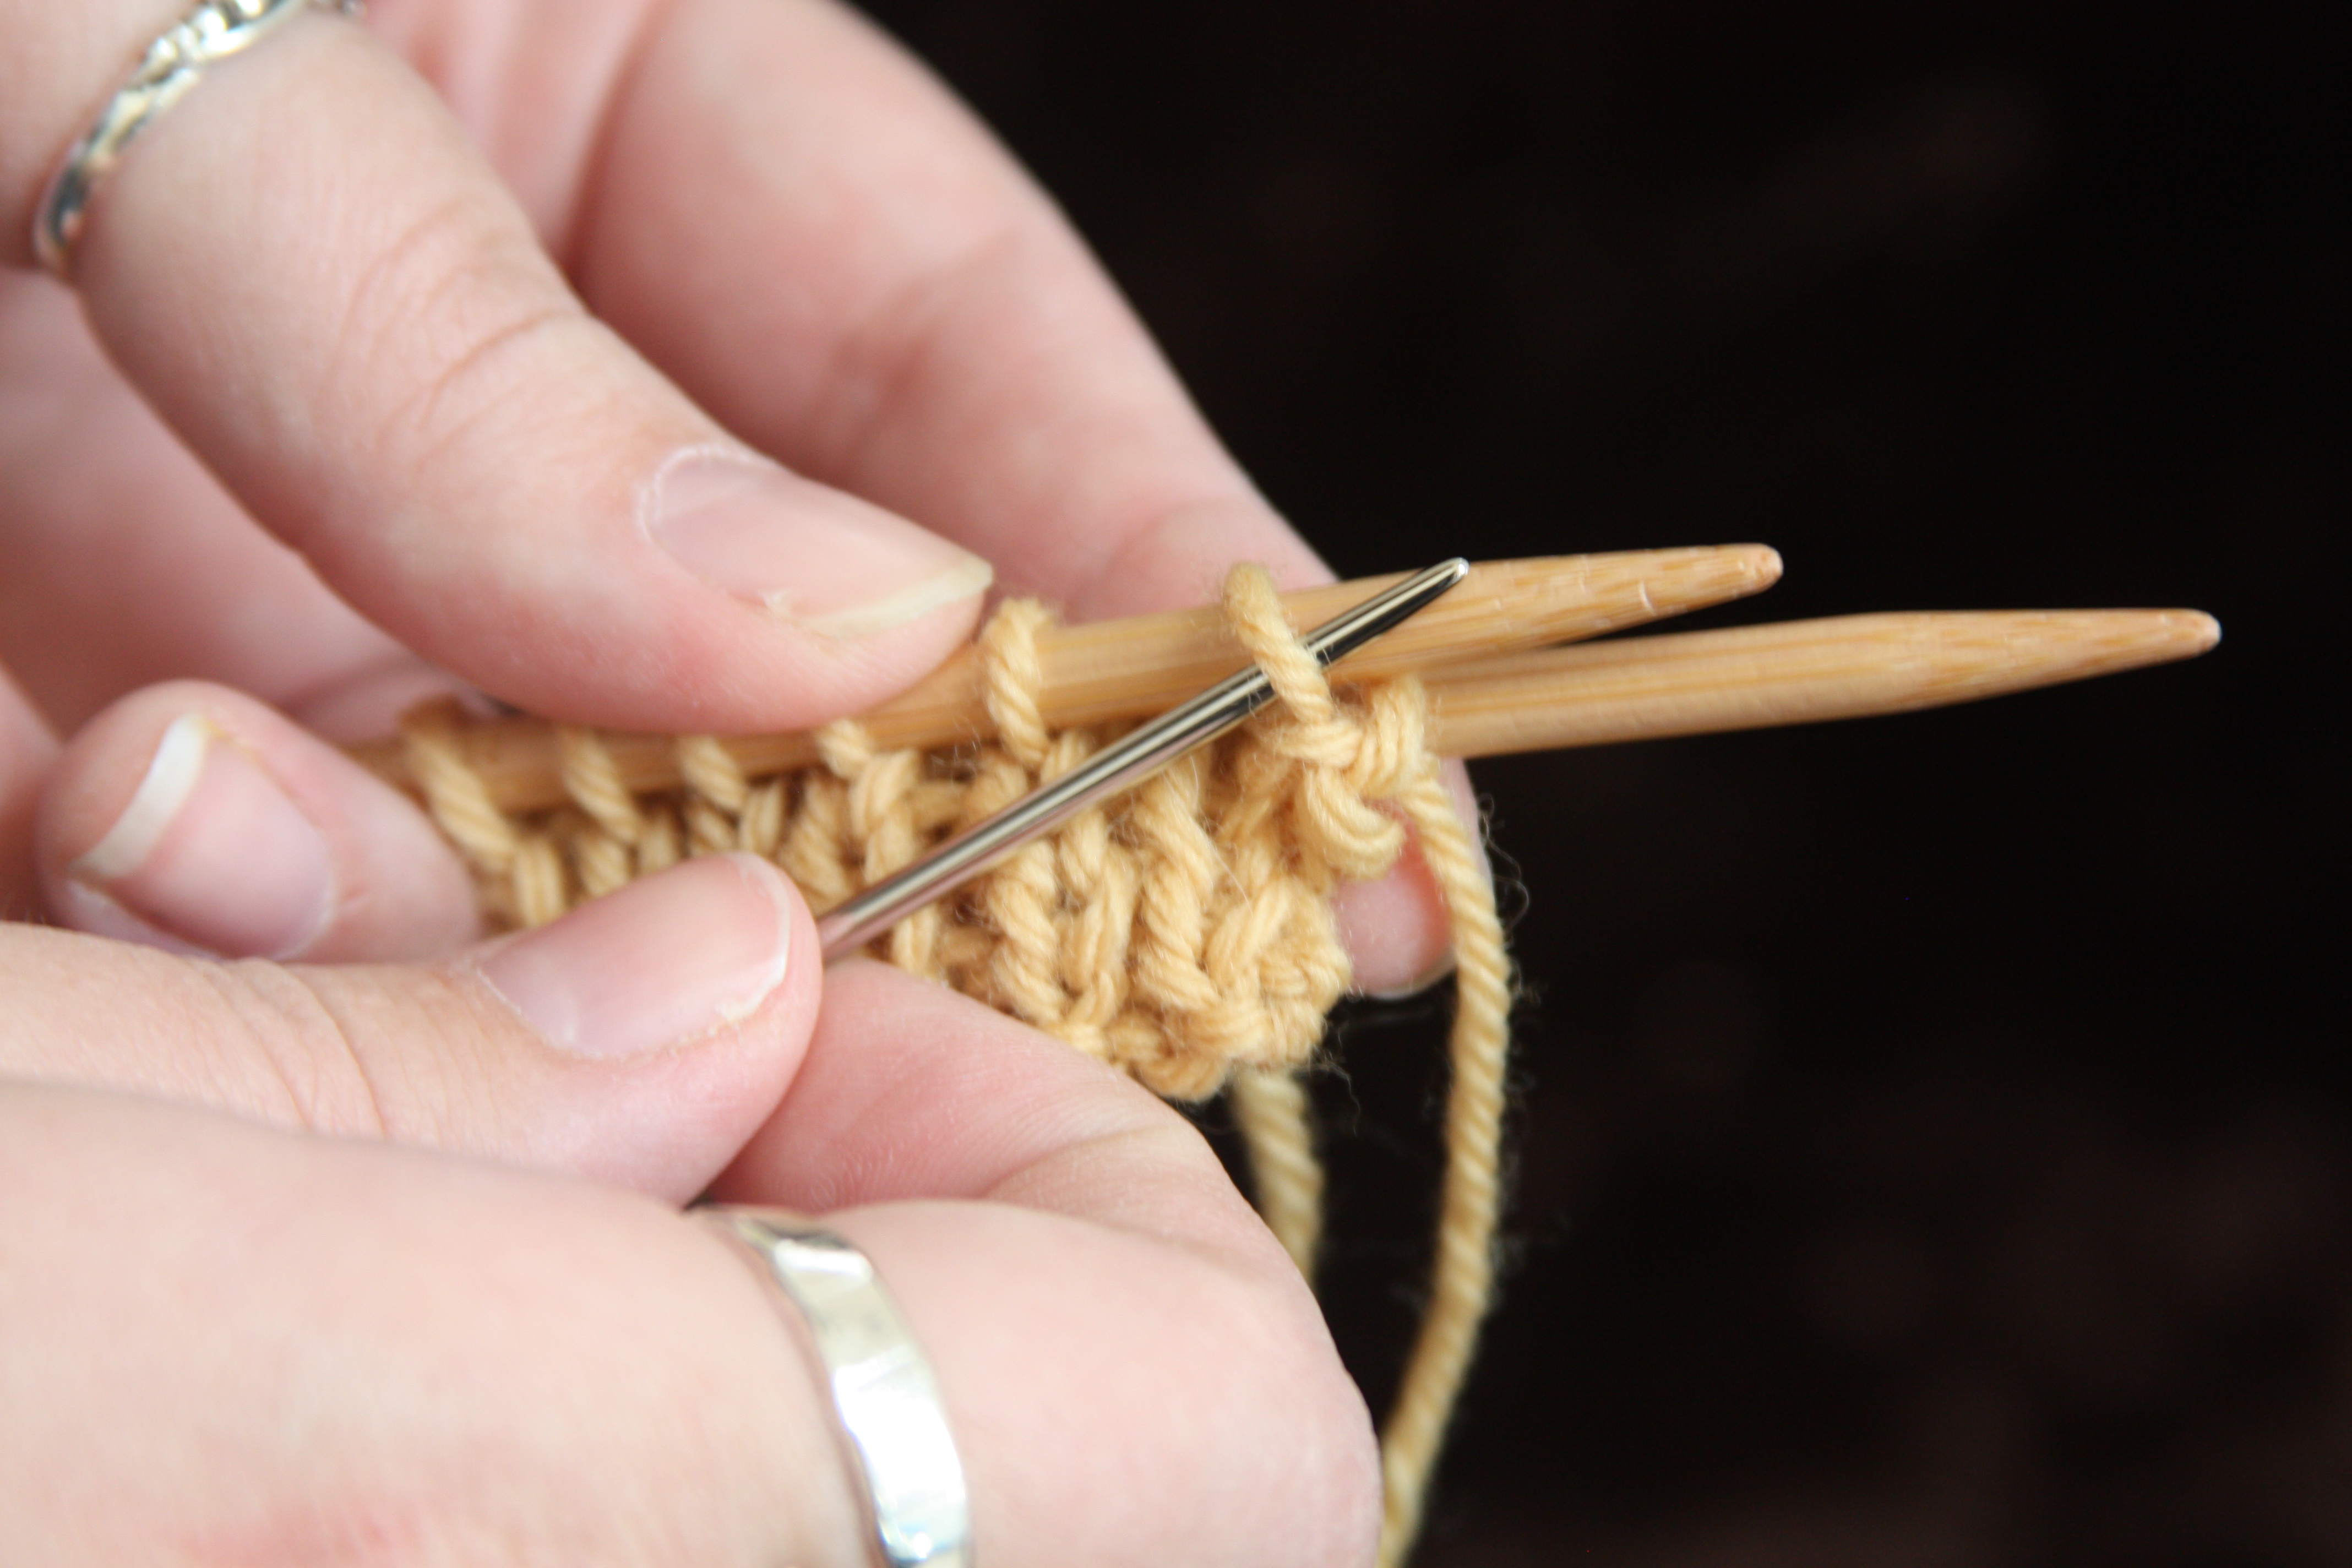
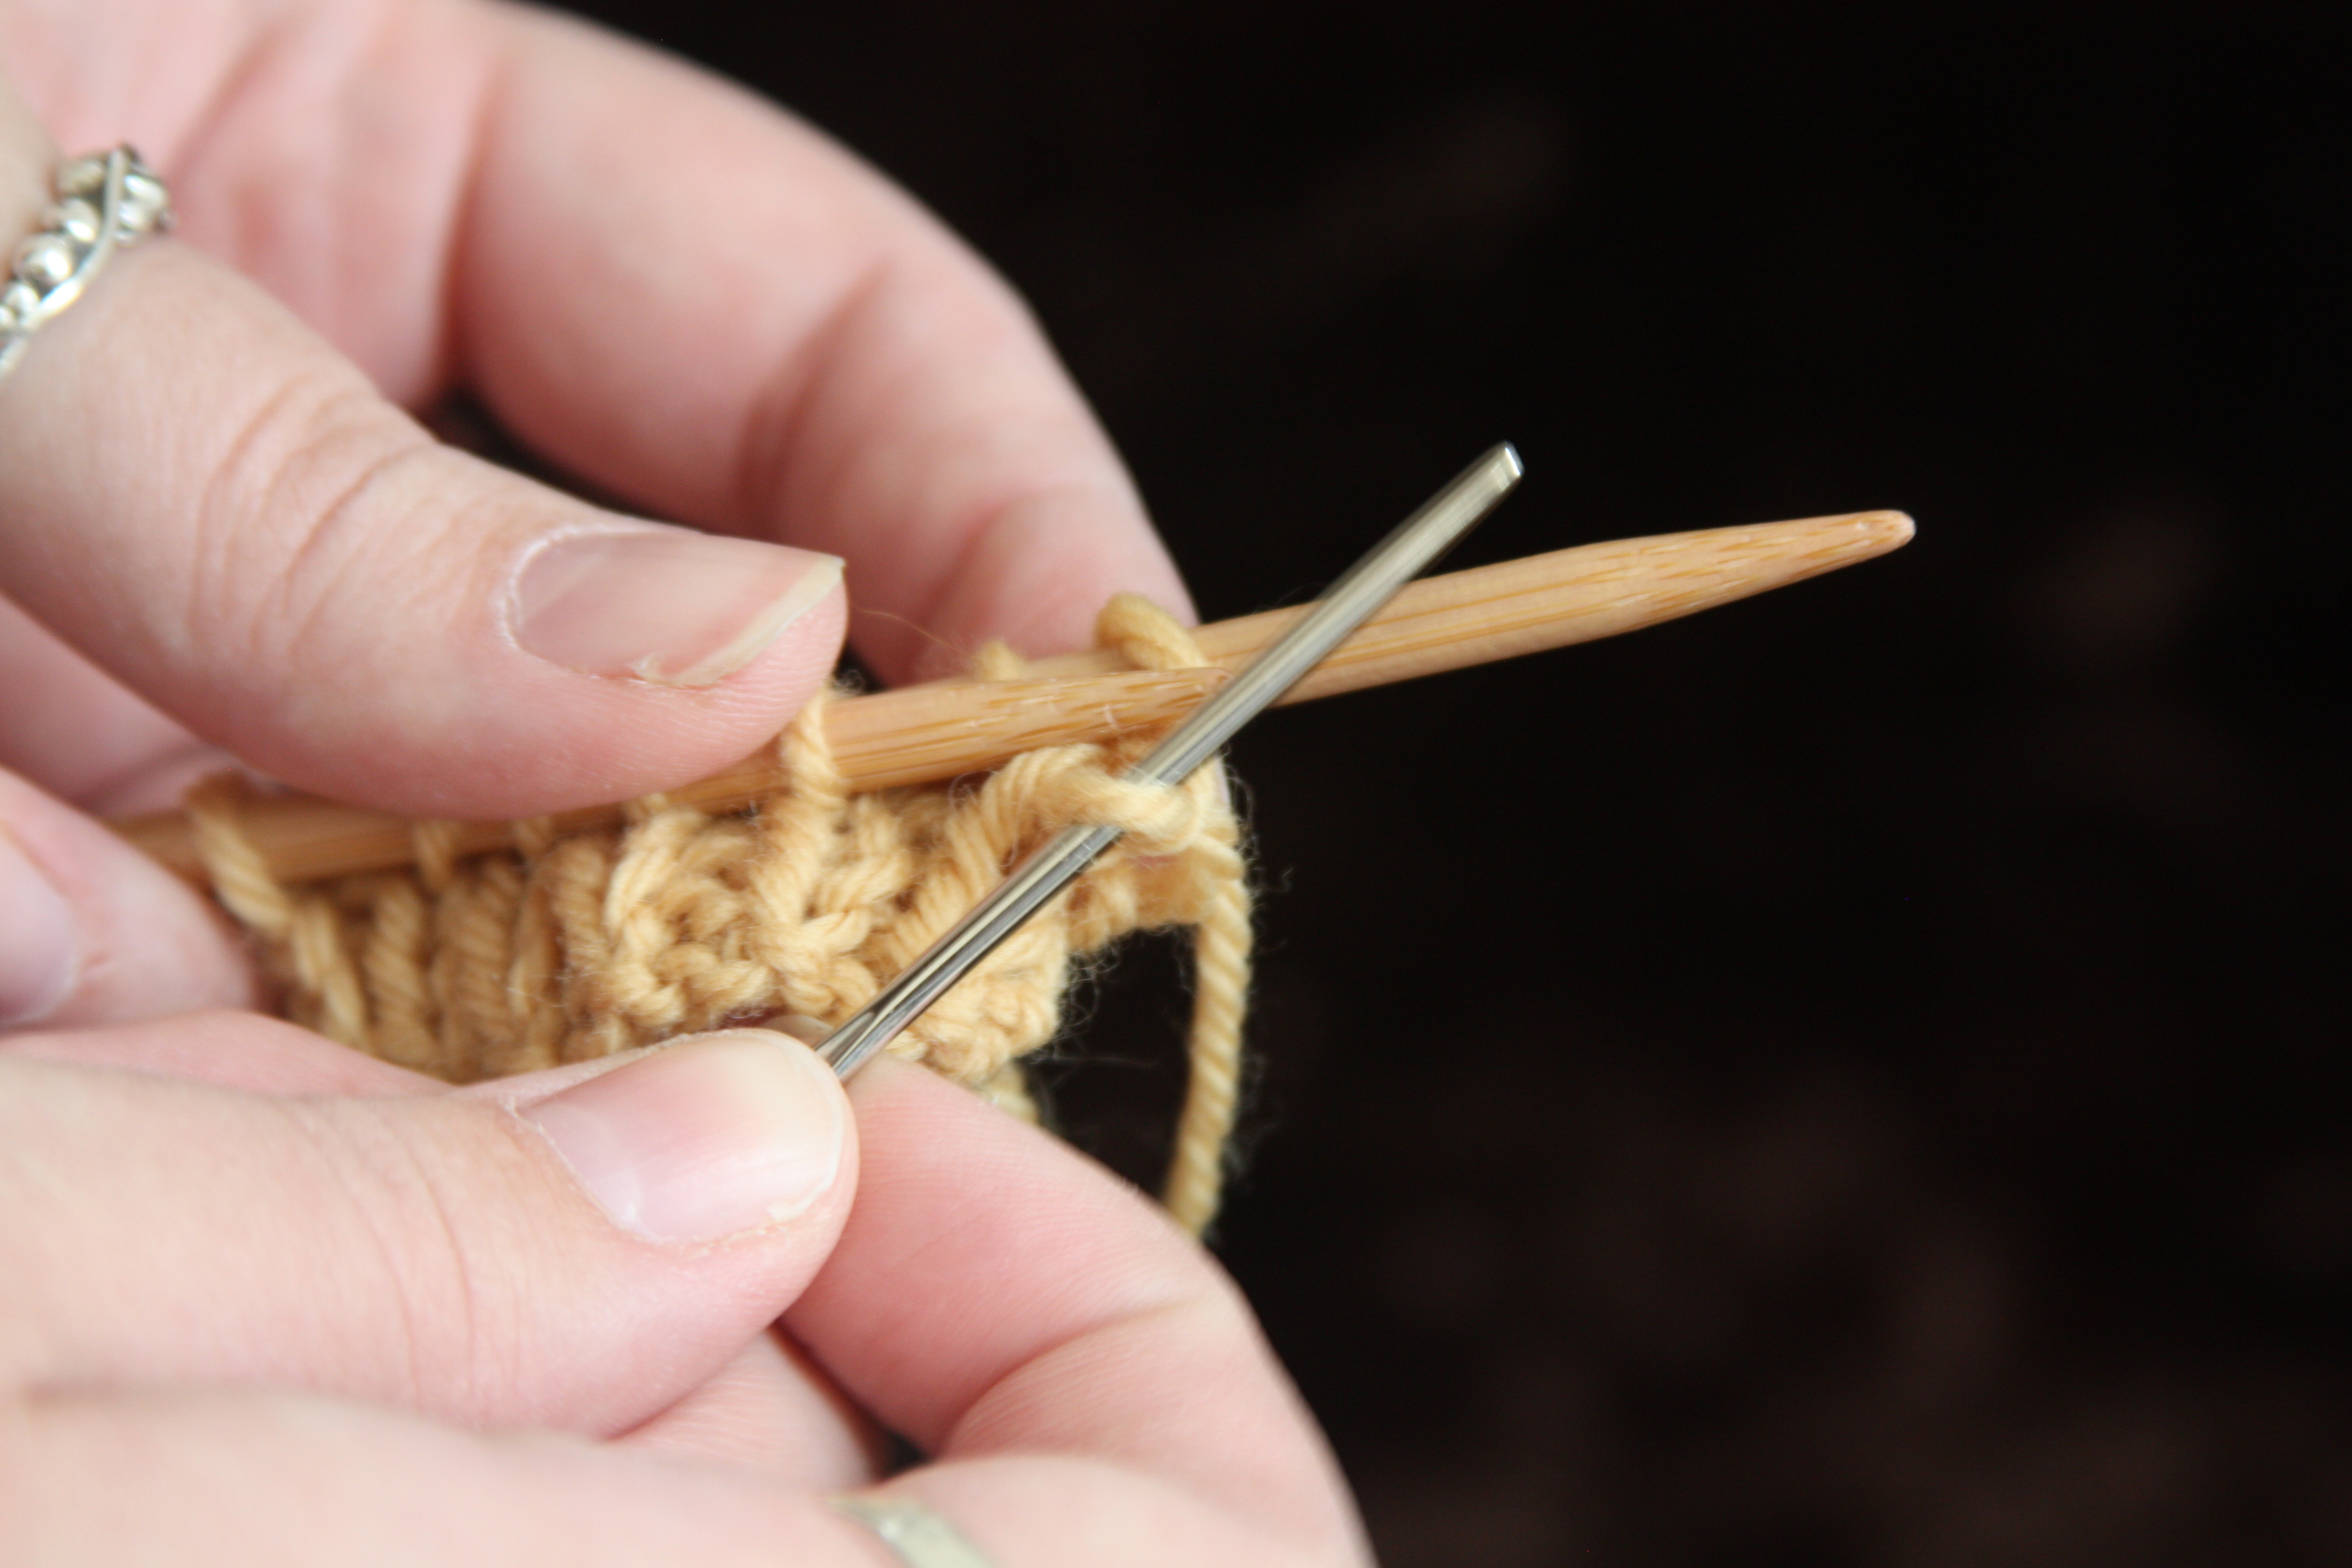
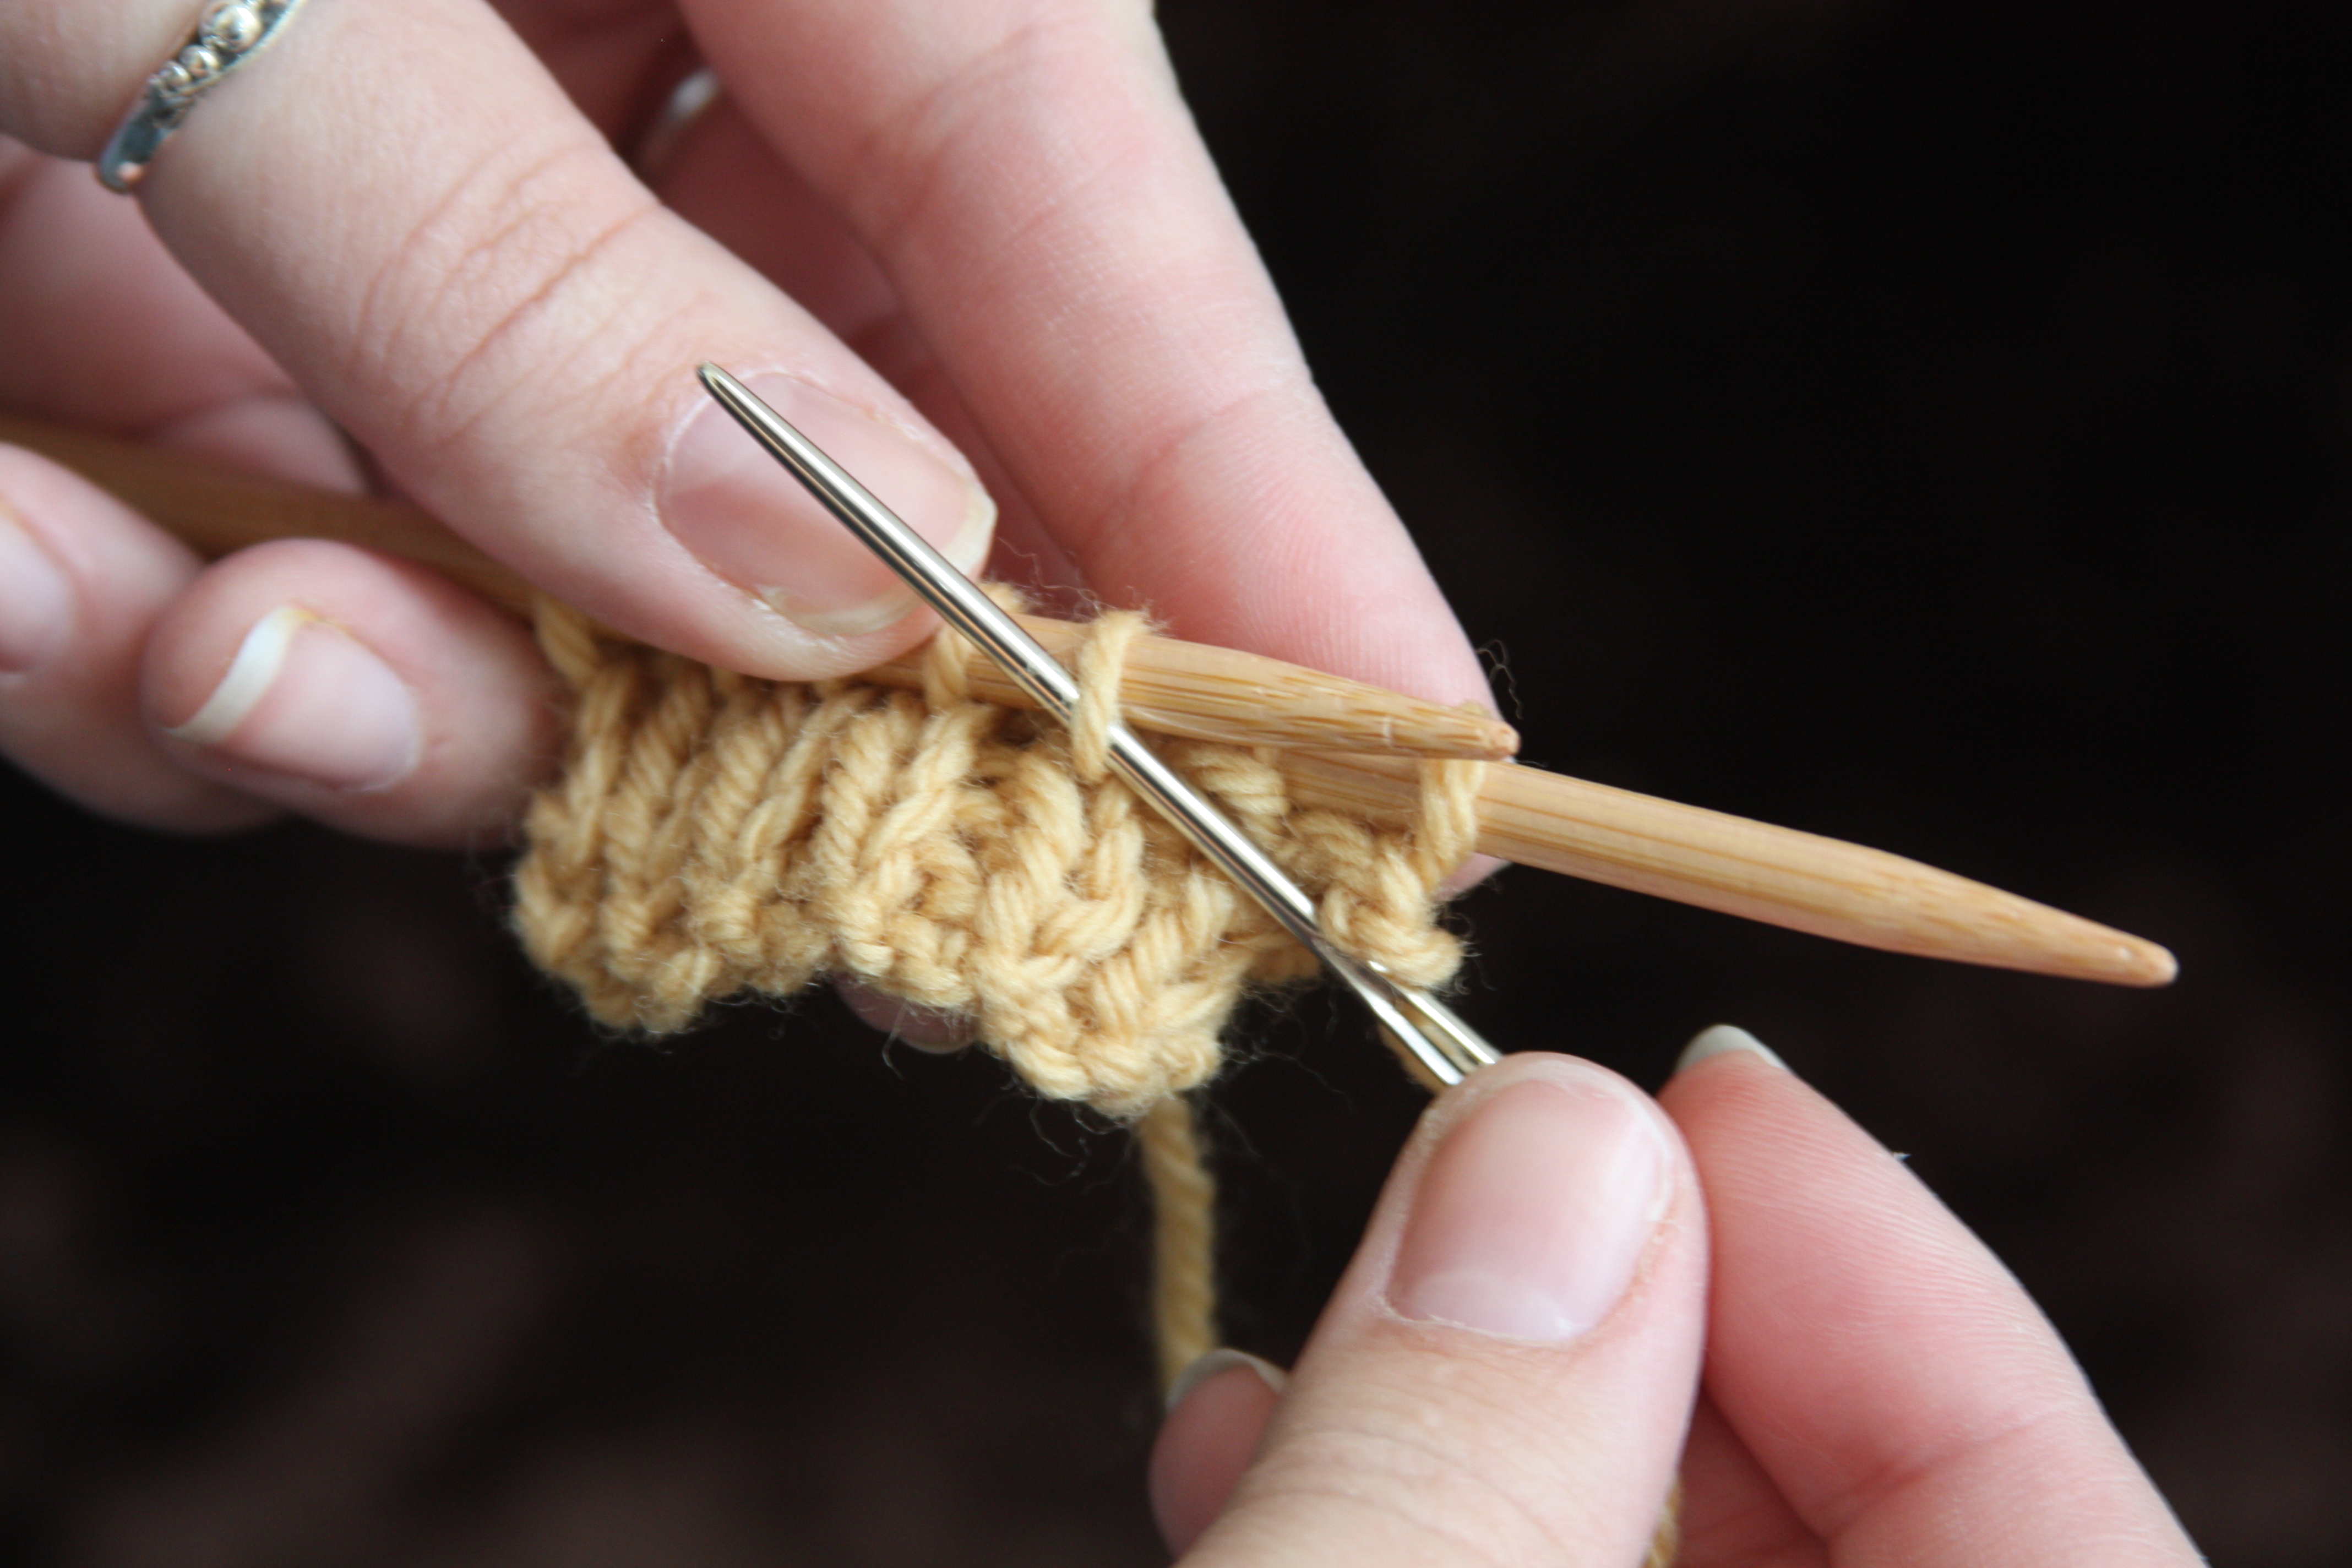
Move the yarn needle to the back again, and insert purlwise into the first purl stitch facing you, pull through, and slide this stitch off the needle. Then insert the yarn needle knitwise into the first purl stitch facing you and pull through.
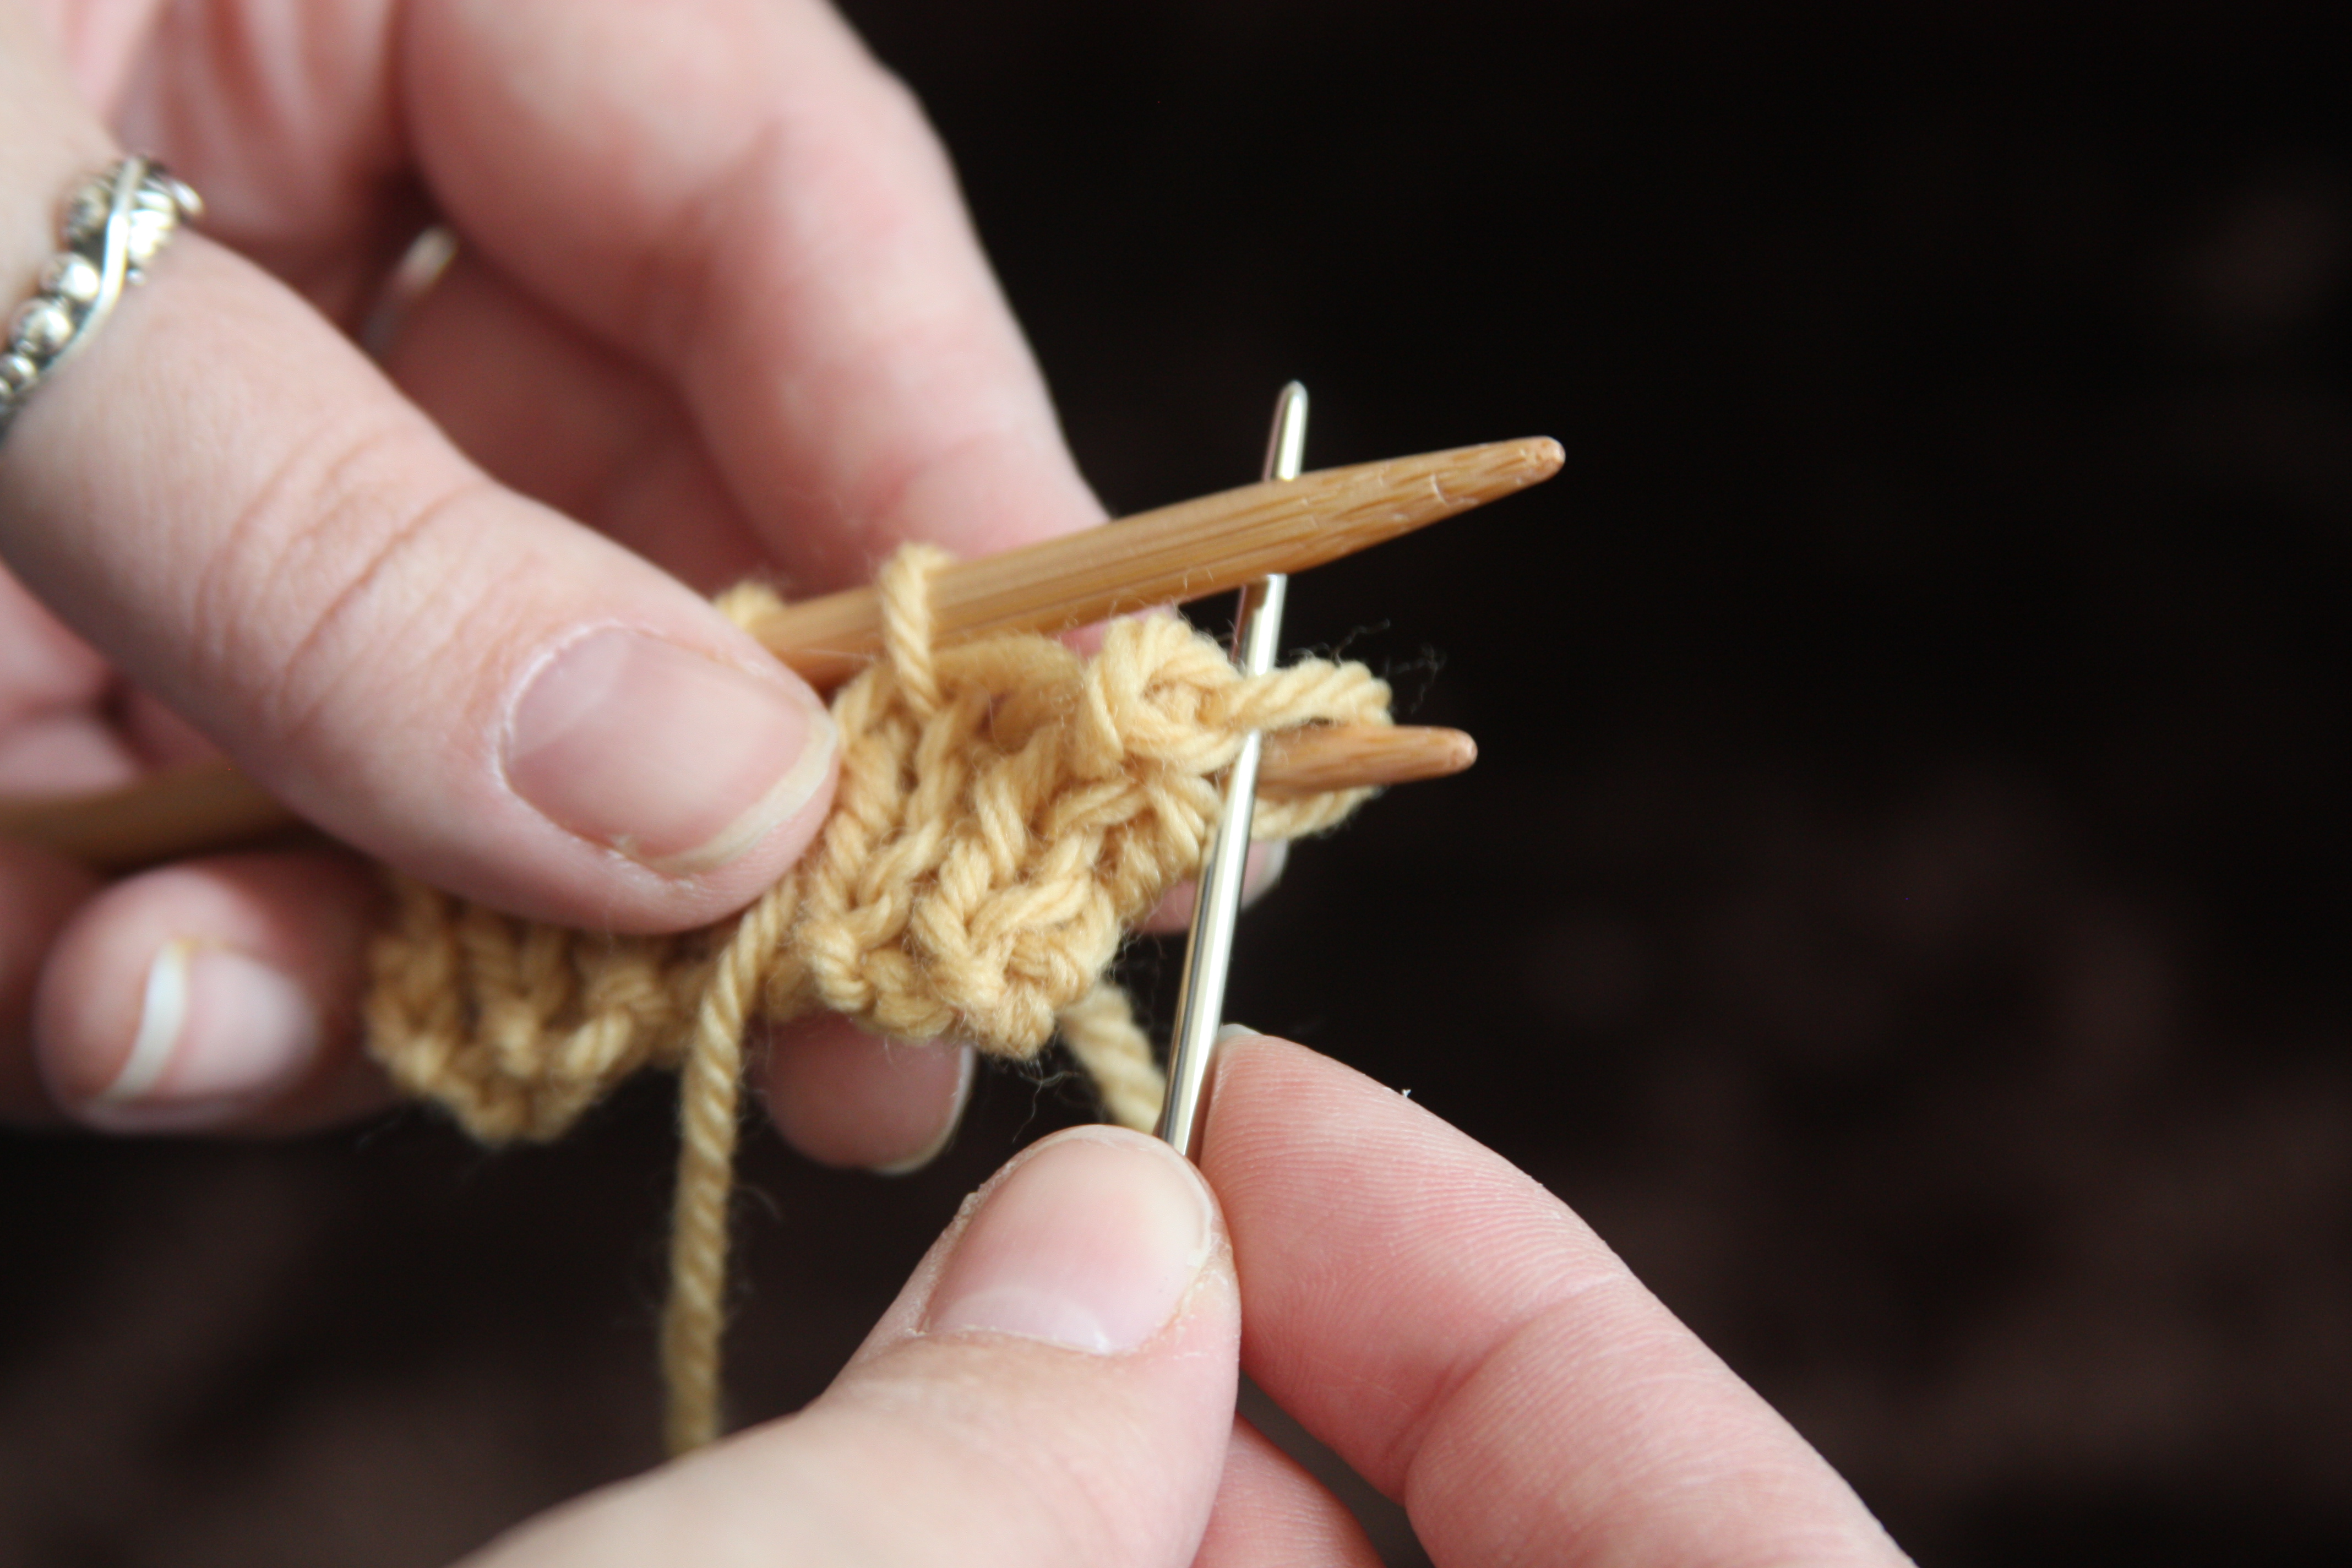
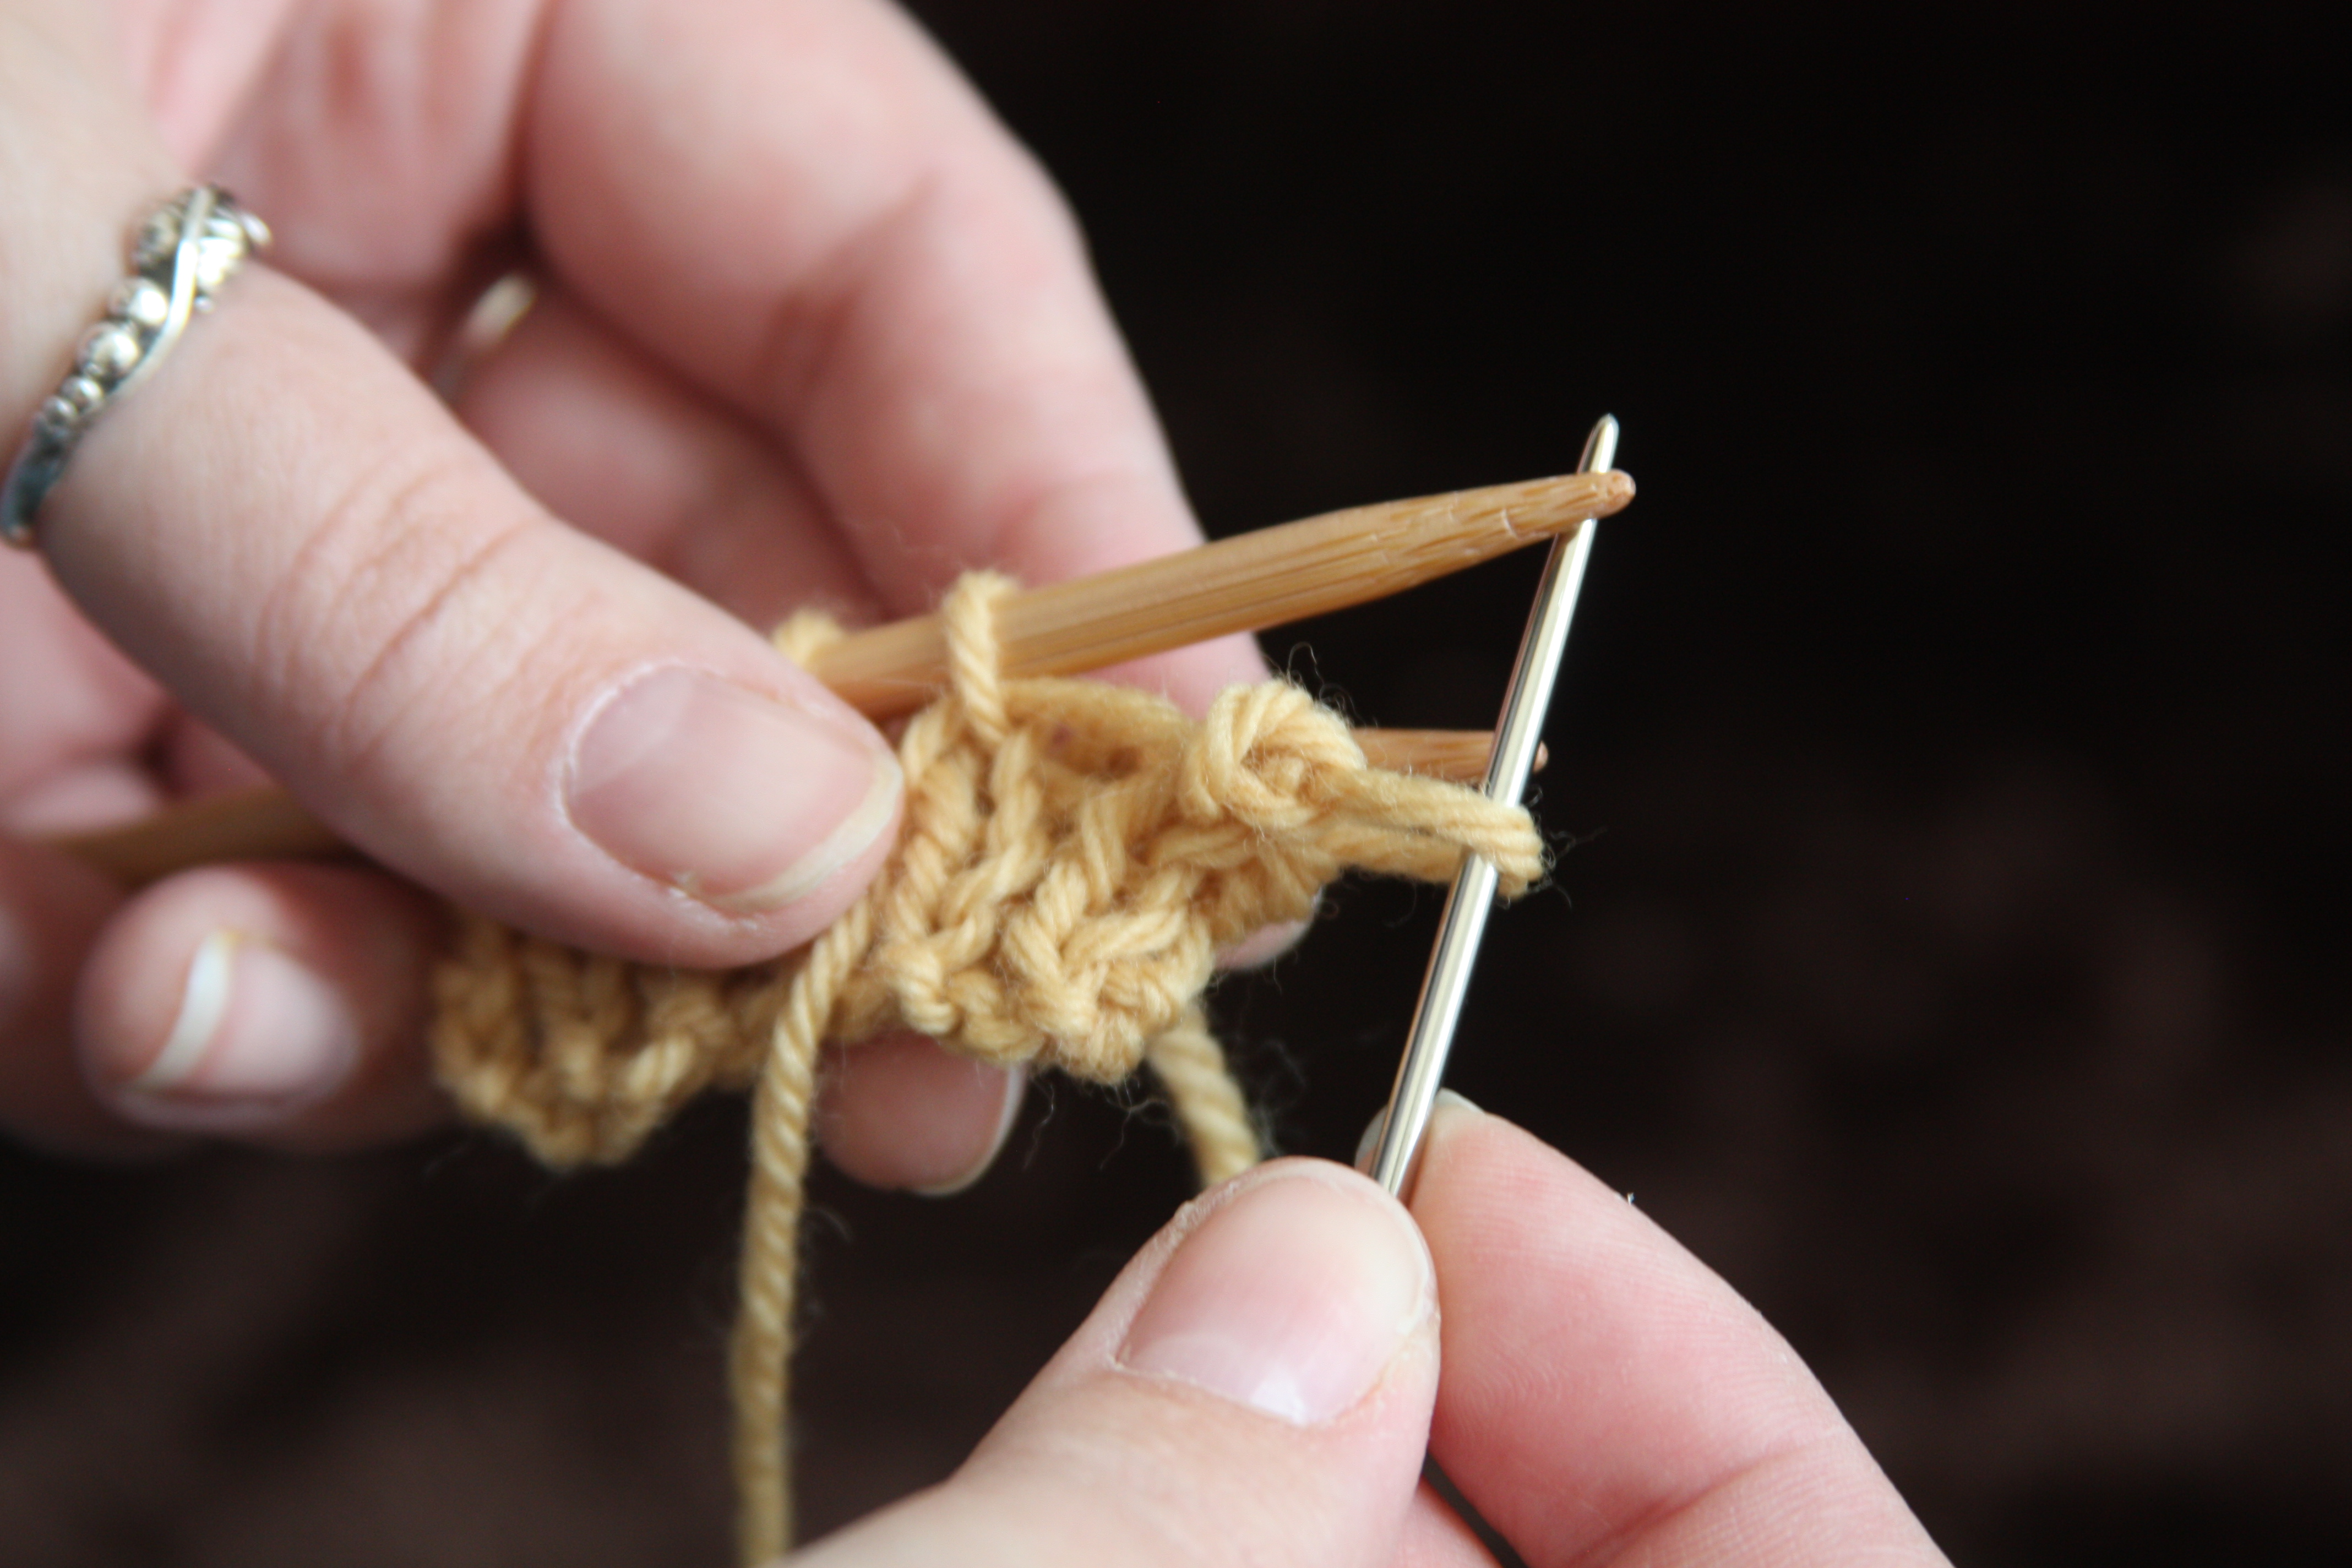

Repeat the last two steps, and keep separating stitches as described above, until all stitches are bound off. Weave the yarn tail into the very first stitch to close the loop.
Anyone who’s done this before have any tips? Anyone who hasn’t done this have any questions?

I’ve never used the tubular bind off, but now I feel I must use it everywhere! Thanks for making it sound so simple! Unlike many knitters, I actually sort of like working kitchener. 🙂
I was so surprised when I started working the bind off and discovered it was so simple. If someone had just said “It’s just grafting,” I would have been all over this so much earlier. I’m glad this post helps! Let me know if you run into any problems.